
Hi there. If you want to know how Myst was made... Then this is for you. Happy Reading
Part One
So here I started by carving out the central Island. I already knew I wanted 3 islands. This was for community lots and businesses and some highrises.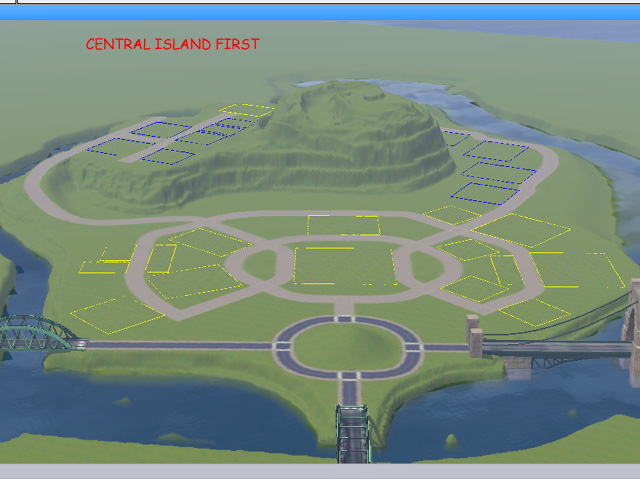
Next came the East Island designed for Large estates and the expensive stuff

In between all this, I started cutting out the shapes of the Islands, removing the excess terrain.

Next came the West island. (oops! mis-labeled in the picture) Anyway, this island was designed for cheaper houses and cottages

The Southern Island was an afterthought, but I needed somewhere to put in a Harbour and the Military base

Then came the details, trees, lights, effects, spawners and all the good stuff.

Here I fiddled with the terain paint, Decided to add one more Island for wildlife and farms

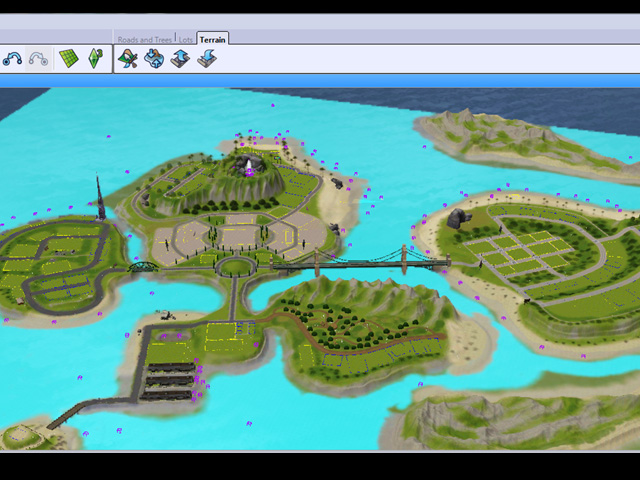
More Islands followed for decorative purposes. I even had all my lots already built in game and just waiting to be placed in the map. Then I realised it was just a mess. It was functional in game, but it lacked structure, and there was too much unused space.

Next, I worked on the texture of the mountain. This was purely experimental. I also wrote the tutorial on sculpting mountains after this.

Moving on, going lower and at the same time going around the mountain peak, which gave Myst its circular shape.

Here I added the bridge. Somehow only one bridge made sense and it was also economical. Lowest Island created. I was also getting close to the edge of the map, so all the space already used had to count. I contemplated adding more tiers to use up the mountain sides, but I didn't want Myst to be too populated.

I cut off all the land I didn't need at this point. I must have also put in the light house as a point of interest. By now I had decided to make the whole island really look like a mountain, because the smooth tiers just didn't wash.

Mountain ridges added. I knew I had made magic at this point. :) All that extra space suddenly didn't look wasted anymore. Here is a tip: work with your strong points. I am good at sculpting, I am patient, but I hate making decorative lots, so every empty space I have has to useful.

This was a good time to test out the waterfall. I test my world in-game several, several times at the sculpting stage. That way I only do the painting once. Because Painting is so stressful for me.

And finally, the painting. I only used 6 terrain paints, because for some reason, any more than that, and I end up having missing textures in-game. This taught me to be wise since I am so limited. Thus came the idea of layering the same paints till I got the effect I wanted. Also after painting, ALL the lots were replaced using the easy fix of delete and undo. This would ensure they blend into the world seamlessly, both in form and colour.

Finally, everything else fell into place. Houses were added and labeled in Edit-in-Game mode and I was done!.

Next came the East Island designed for Large estates and the expensive stuff

In between all this, I started cutting out the shapes of the Islands, removing the excess terrain.
Next came the West island. (oops! mis-labeled in the picture) Anyway, this island was designed for cheaper houses and cottages
The Southern Island was an afterthought, but I needed somewhere to put in a Harbour and the Military base
Trimmed away what I didn't need and Presto! World complete. So I thought
Then came the details, trees, lights, effects, spawners and all the good stuff.
Here I fiddled with the terain paint, Decided to add one more Island for wildlife and farms
More Islands followed for decorative purposes. I even had all my lots already built in game and just waiting to be placed in the map. Then I realised it was just a mess. It was functional in game, but it lacked structure, and there was too much unused space.
Part Two
Believe it or not. I started all over again. Yes, from scratch. This didn't take so long. I decided to solve the problem of wasted space by merging it all into one island. And that's how Myst was born.
I raised the terrain to the highest point at the center of the map and started working my way down.
First came the central island. The road plan was trimmed to be efficient. No more unnecessary roads that your sims would never use.
Next, I worked on the texture of the mountain. This was purely experimental. I also wrote the tutorial on sculpting mountains after this.
Moving on, going lower and at the same time going around the mountain peak, which gave Myst its circular shape.
Here I added the bridge. Somehow only one bridge made sense and it was also economical. Lowest Island created. I was also getting close to the edge of the map, so all the space already used had to count. I contemplated adding more tiers to use up the mountain sides, but I didn't want Myst to be too populated.
I cut off all the land I didn't need at this point. I must have also put in the light house as a point of interest. By now I had decided to make the whole island really look like a mountain, because the smooth tiers just didn't wash.
Mountain ridges added. I knew I had made magic at this point. :) All that extra space suddenly didn't look wasted anymore. Here is a tip: work with your strong points. I am good at sculpting, I am patient, but I hate making decorative lots, so every empty space I have has to useful.
This was a good time to test out the waterfall. I test my world in-game several, several times at the sculpting stage. That way I only do the painting once. Because Painting is so stressful for me.
And finally, the painting. I only used 6 terrain paints, because for some reason, any more than that, and I end up having missing textures in-game. This taught me to be wise since I am so limited. Thus came the idea of layering the same paints till I got the effect I wanted. Also after painting, ALL the lots were replaced using the easy fix of delete and undo. This would ensure they blend into the world seamlessly, both in form and colour.
Finally, everything else fell into place. Houses were added and labeled in Edit-in-Game mode and I was done!.
So thanks for following me on my journey. Myst was built while writing the beginner chapters of this blog. So you could say that while I was teaching, I was also learning too.
It looks fabulous. I commend you for taking on such a hefty task, and creating a beautiful world. Kudos!
ReplyDeleteThank you Anonymous. I had fun making it, and several days of hair pulling frustration too. But it was worth it!
DeleteHow do I use edit in game mode?
Deleteplease visit this page. http://krrank.blogspot.com/2012/01/chapter-six-edit-in-game.html
DeleteBeautiful island, but I notice the water is two different colors. Does it change in-game?
ReplyDeleteHi Scarlett,
DeleteThanks. No, it's actually just the normal color of water. It looks different because the FOG is turned off in some of the pictures.
This comment has been removed by the author.
ReplyDeleteHi, Krrank!
ReplyDeleteI just got to say, your site has been extremely helpful to me while I constructed my world! Thanks a lot!
Hello Sabina. Thank you! Happy you found help on this blog.
Deletewhen you will gonna publish something more?
ReplyDeleteOMG, I want new things about CAW, no?
Hi there. It has been a long while I know. Just been lazy,:). But I do have a few topics in mind. Now I just need to sit down and write them out. Wish me luck!
DeleteOh my! So you're like me!
DeleteCan't wait for more things! I would like to know how to make mountains on the city edge, but in a realistic way. I did one, my world its a continent with some islands, but it was weird...
Wish you luck! Bye!
Heey I would like to ask you how you made the different water levels, and if you maybe know how to undo them to. I'm remaking isla paradiso more to my likings, eventhough I can't get the water and sun colour to work since it has the default right now. To get to my point, there is a lake on a island witch I want to transform into a mountain lake instead of a big hole, but I can't sculp the lake with my terain sculpting tools. Since you are one of the best CW designers I have ever seen I was hoping You could help me somehow.
ReplyDeleteHI,
DeleteSorry for the late reply. If you could email me a picture of what you are working on, then I will be able to assist you. it's all about the sculpting. krranky305@gmail.com
Hi,
DeleteI have seen your email and the picture. The solution is this
1) Select and Delete the Waterfall effects and other effects on the Lake
2) Use the mountain tool or the Flatten terrain tool to remove the Lake
3) Sculpt your mountain
4) Create an Empty lot on the mountain and make it Community lot
5) Go to Edit in Game and edit the Lot. This is where you can create your mountain lake
6) Save and return back to CAW. Now you can add your effects
Basically the lakes on the mountain are all separate Lots which I arranged to look like one big waterfall.
hi i want to ask where can i download caw ??? please respond fast
ReplyDeletehi i want to ask where can i download caw ??? please respond fast
ReplyDeletehttps://www.thesims3.com/game/tools/world
DeleteHi. I can't get the effects to work. What am I doing wrong? I click on the waterfall but no box or anything shows up 😞
ReplyDeleteHi Victoria,
DeleteSorry for the late reply. You might have solved this problem already. Did you use the tutorial in this link? http://krrank.blogspot.com/2012/01/tiptorial-trees-plants-rocks-spawners.html
Also, did you create a separate layer for effects? Effects work the same way as other objects. Is it all the effects that are not working or just the waterfalls? Please send an image if you can.