
1. Open up your world. I am using a desert terrain as the effect is better. We are working with the Scuplt tab found under terrain editing tools. For the brush parameters, s is Size, o is Strength and f is falloff.


3. Next, change to the Flatten brush and just drag along the mountain to create a raised even block


4. Now select the Mountain brush again and ADD a second layer on top of the first layer like so

5. Switch to the Flatten Brush s-40 o-25 f-50 and raise the second layer too.

You should have something like this... This shows the back view too, and as you can see, it shouldn't be perfect. We want to keep it natural looking.

6. Still using the flatten brush, you may change the size as needed, Trim and Shape the cliff. There is no right or wrong here. Just let out your inner sculptor and carve away.


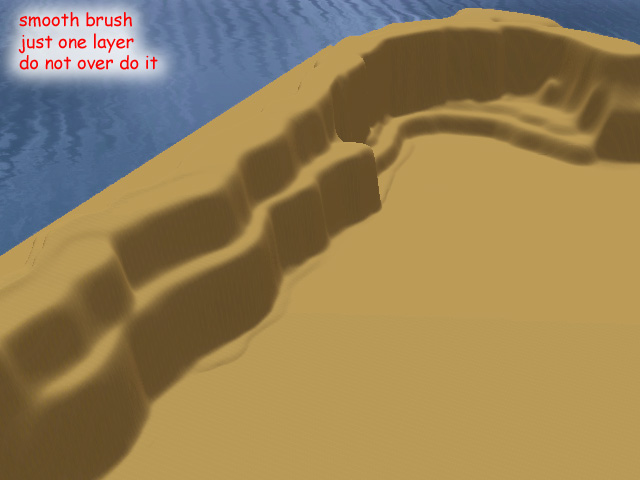
7. Change to the Smooth brush and just sweep it all over once. We don't want to lose the shape.
8. Switch to Flatten-Gentle brush s-8 o-50 f-50. Click and hold on one spot to dig in. Be patient.


You can also use Flatten brush but set it to s-8 o-15 f-50. This is much faster to use. Dragging the brush along the edges can also create a nice ridges effect.


9. Now this is optional. But you can add a little texture on top of the cliff. Use Mountain brush s-35 o-10 f-50. click and drag.

Taa daaa!!! One nice canyon. Looks great at sunset.
And that's all there is to it. But Note the Following.
1. You can set your brush sizes to whatever you wish. Just be sure to keep you strength to about 10% of the brush size, and your falloff to about 50% of the brush size. It is all about proportion. Test and experiment and save the sets you like.
2. Canyons are meant to be a little blocky so try not to smooth them. They do not require much terrain painting either, if any at all.
3. Use different heights and layers for the best effect. This also creates the light and shadows effects that makes it look two-toned
Super tutorial :) Thank you very much :)
ReplyDeleteHey visty 6, you're most welcome.
DeleteI was planning on doing a canyon-themed world, and this definitly helped a lot! Thanks!
ReplyDeleteHi Anonymous,
DeleteYou are welcome. I would appreciate a link to your world once it is done. If you are sharing it, that is. Good luck and have fun.
That is a gorgeous canyon wall. or it could be the side of a mesa. How far down could one go with it? To make something like the Grand Canyon. Would need another canyon wall like that with a river between them. Then level the tops all the way to the edges of the map?
ReplyDeletehello again,
Deleteyou can't actually go down much, you'll simply hit water. But you can make the canyon very high and place you city at a level that will have you looking downwards into the canyon and yes a river running in between would be nice too